Photography Gear Icon Pack: Choosing, Using, and Avoiding Common Pitfalls
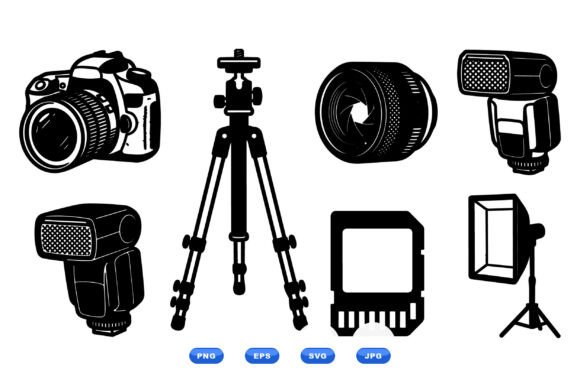
Whether you're a professional photographer, a digital marketer, or someone building a creative portfolio, the Photography Gear Icon Pack can be a valuable visual asset. This collection of bold, clean vector icons—featuring elements like camera lenses, tripods, flashes, memory cards, and studio lights—is designed to support a wide range of uses, from web graphics and branding to mockups and presentations. However, even the best tools can lead to frustration if not used correctly.
Many users overlook small but important details when downloading, applying, or evaluating the Photography Gear Icon Pack. These oversights can affect the clarity of your designs, the efficiency of your workflow, and even the professionalism of your final output. Let’s walk through some of the most common issues and how you can avoid them.
1. Assuming All Icon Formats Are Equal
One of the standout features of the Photography Gear Icon Pack is the variety of formats included: SVG, EPS, PNG, and JPG. While this gives users flexibility, it's important to understand when each format is appropriate.
For example, SVG and EPS files are vector-based, meaning they scale without losing quality—ideal for print or responsive web design. On the other hand, PNG is a high-quality raster format suitable for web use, especially when transparency is needed. JPG files, while common, are not ideal for sharp icons because they compress images in a way that can blur edges.
Mistake: Using JPG icons for a website or app mockup can lead to pixelated graphics on high-resolution screens.
Better approach: Stick to SVG for web and EPS for print unless your platform specifically requires a different format. Always preview icons at different sizes to ensure clarity.
2. Ignoring Scalability Needs
The Photography Gear Icon Pack is praised for being fully scalable, thanks to its vector format. But many users don't realize how important scalability is until they try to use an icon in both a mobile app and a printed brochure.
Mistake: Downloading only PNG versions at a fixed size and later finding they don’t look good when enlarged for print or displayed on high-density screens.
Better approach: Always download and keep the vector versions (SVG or EPS) as your primary source. You can scale them down as needed, but you can't scale raster files up without quality loss.
Tip: Use SVG for Responsive Design
If you're working on a website or app, SVG is your best bet. It maintains sharpness on any screen and can be styled with CSS, making it easy to integrate into modern web projects.
3. Overlooking Design Consistency
The Photography Gear Icon Pack is designed as a unified set with clean black-and-white contours and bold lines. However, some users mix these icons with other icon sets that have different styles—like rounded corners, color gradients, or thinner lines—creating visual dissonance.
Mistake: Combining Photography Gear Icon Pack with icons from different design systems, leading to an unprofessional or cluttered look.
Better approach: If you're using this pack for branding or a UI project, stick to the set. If you must use other icons, choose ones with similar stroke weight, color scheme, and overall aesthetic.
4. Misunderstanding Licensing Terms
Another common issue is misunderstanding how the Photography Gear Icon Pack can be used legally. While many icon sets are royalty-free, some have restrictions on commercial use, redistribution, or modification.
Mistake: Using the icons in a product you plan to sell without verifying the license allows it, which can lead to legal complications.
Better approach: Read the license agreement carefully before downloading. If you're unsure, reach out to the provider or choose a pack with a clear, permissive license like Creative Commons Zero or a commercial-use license.
5. Not Previewing Before Implementation
Even with high-quality icons, it's easy to assume they'll look great in your design without checking. But small details like line thickness, spacing, or contrast can make a big difference when icons are placed on different backgrounds or alongside text.
Mistake: Dropping an icon into a design without testing how it looks at different sizes or in various contexts.
Better approach: Create a quick preview sheet with each icon at multiple sizes and against different background colors. This helps you catch issues like readability or visual imbalance early.
6. Underestimating the Value of a Complete Set
The Photography Gear Icon Pack includes a wide range of photography-related elements, which makes it ideal for websites or apps focused on photography tools, tutorials, or services. However, some users only download a few icons and miss out on the full value of the pack.
Mistake: Purchasing or downloading individual icons instead of the full set, only to later realize they need additional icons that aren't available separately.
Better approach: Evaluate your entire project before downloading. If you're building a photography-related website or app, consider the full set as a long-term investment. It ensures consistency and saves time in the long run.
7. Using Icons Without Purpose
Icons are meant to enhance communication, not replace it. A common mistake is over-relying on icons without providing context or labels, which can confuse users.
Mistake: Using a memory card icon in a UI without any accompanying text, leaving users guessing what action it represents.
Better approach: Pair icons with clear labels or tooltips, especially in interfaces where user understanding is critical. Use icons to support your message, not carry it alone.
What to Check Before Downloading or Buying
Before committing to the Photography Gear Icon Pack, take a few moments to verify the following:
- Format availability: Are SVG, EPS, PNG, and JPG all included?
- Scalability: Can you scale the icons without loss of quality?
- Licensing: Is the license compatible with your intended use?
- Design consistency: Do the icons match your brand or project style?
- Preview options: Can you view the icons in action before purchasing?
By doing a quick check on these points, you’ll avoid many of the common frustrations users face after download.
Final Thoughts
The Photography Gear Icon Pack is a powerful tool for designers, marketers, and creators who want to visually represent photography-related concepts with clarity and professionalism. But like any design asset, its effectiveness depends on how well you understand and apply it.
Take the time to review the formats, test the icons in your intended context, and understand the licensing terms. These small steps can prevent headaches down the line and ensure your final designs look sharp and function well across platforms.